Automatic weekly printing: How to prevent clogged nozzles on an ink-jet printer
One of the biggest problems with ink-jet printers is clogged nozzles if the device is not used regularly. If you print infrequently, the ink dries out in the printer head, which leads to poor printing, skipping lines or complete failure of the print head.
The solution is simple: the printer must work at least once a week. So that you don't have to think about it, I prepared a PowerShell script that, in combination with the Windows Task Scheduler, will completely automate this process.
The script ensures that the test page is printed exactly once per ISO week. Even if your computer was turned off at the time the print was scheduled, the script will recognize this and do the job as soon as you turn on the computer, making sure that the print is not repeated unnecessarily.
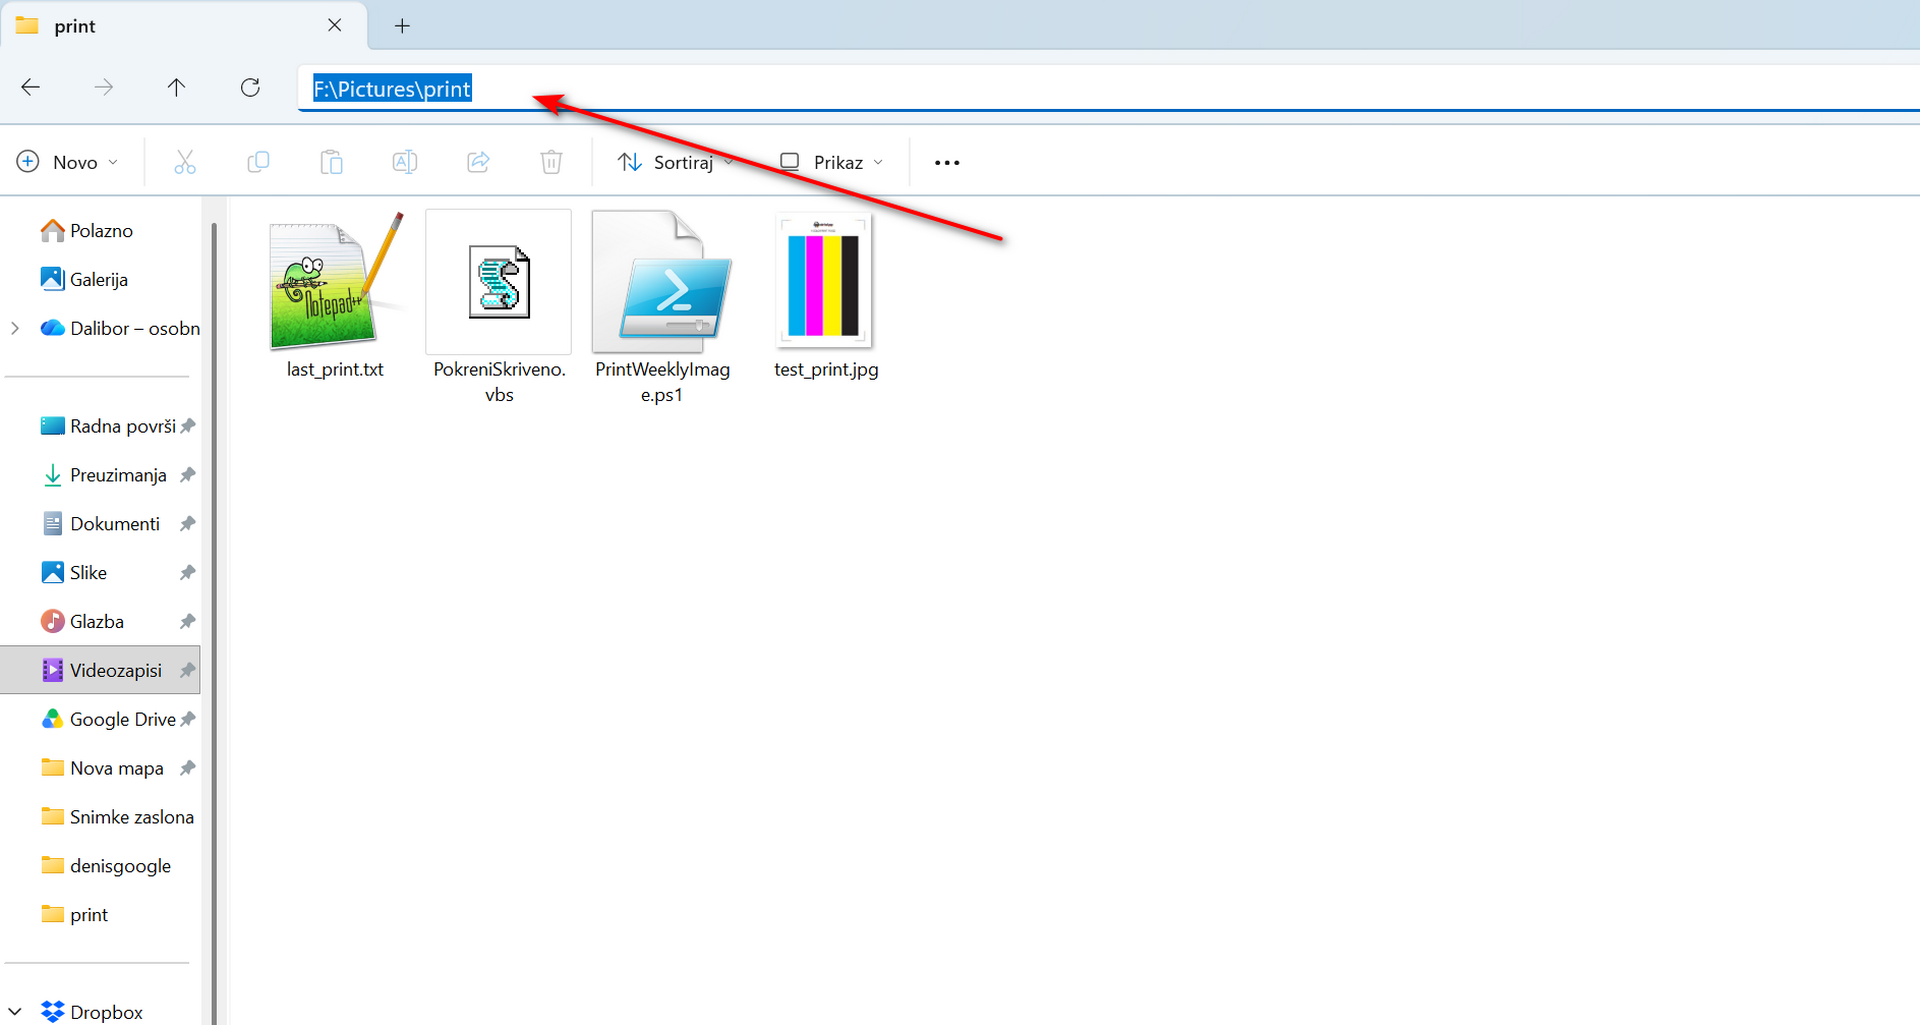
There are three files in the ZIP archive:
1. PrintWeeklyImage.ps1 - Main PowerShell script.
2. Run Hidden.vbs - the script runs the command in the background without user interaction and does not interfere with work
3. test_print.jpg - Specially prepared CMYK test image designed to activate all nozzles with minimal ink consumption.
4. last_print.txt - text file where the date of the last print is recorded
First steps
Once you have downloaded and extracted the files (eg to a folder on your disk), you need to open the PrintWeeklyImage.ps1 file (right click -> Edit or open in Notepad) and change the paths to suit your computer.
A small note! - when saving you must be careful not to save as a plain text file that ends with .txt but must be .ps1 at the end of the file
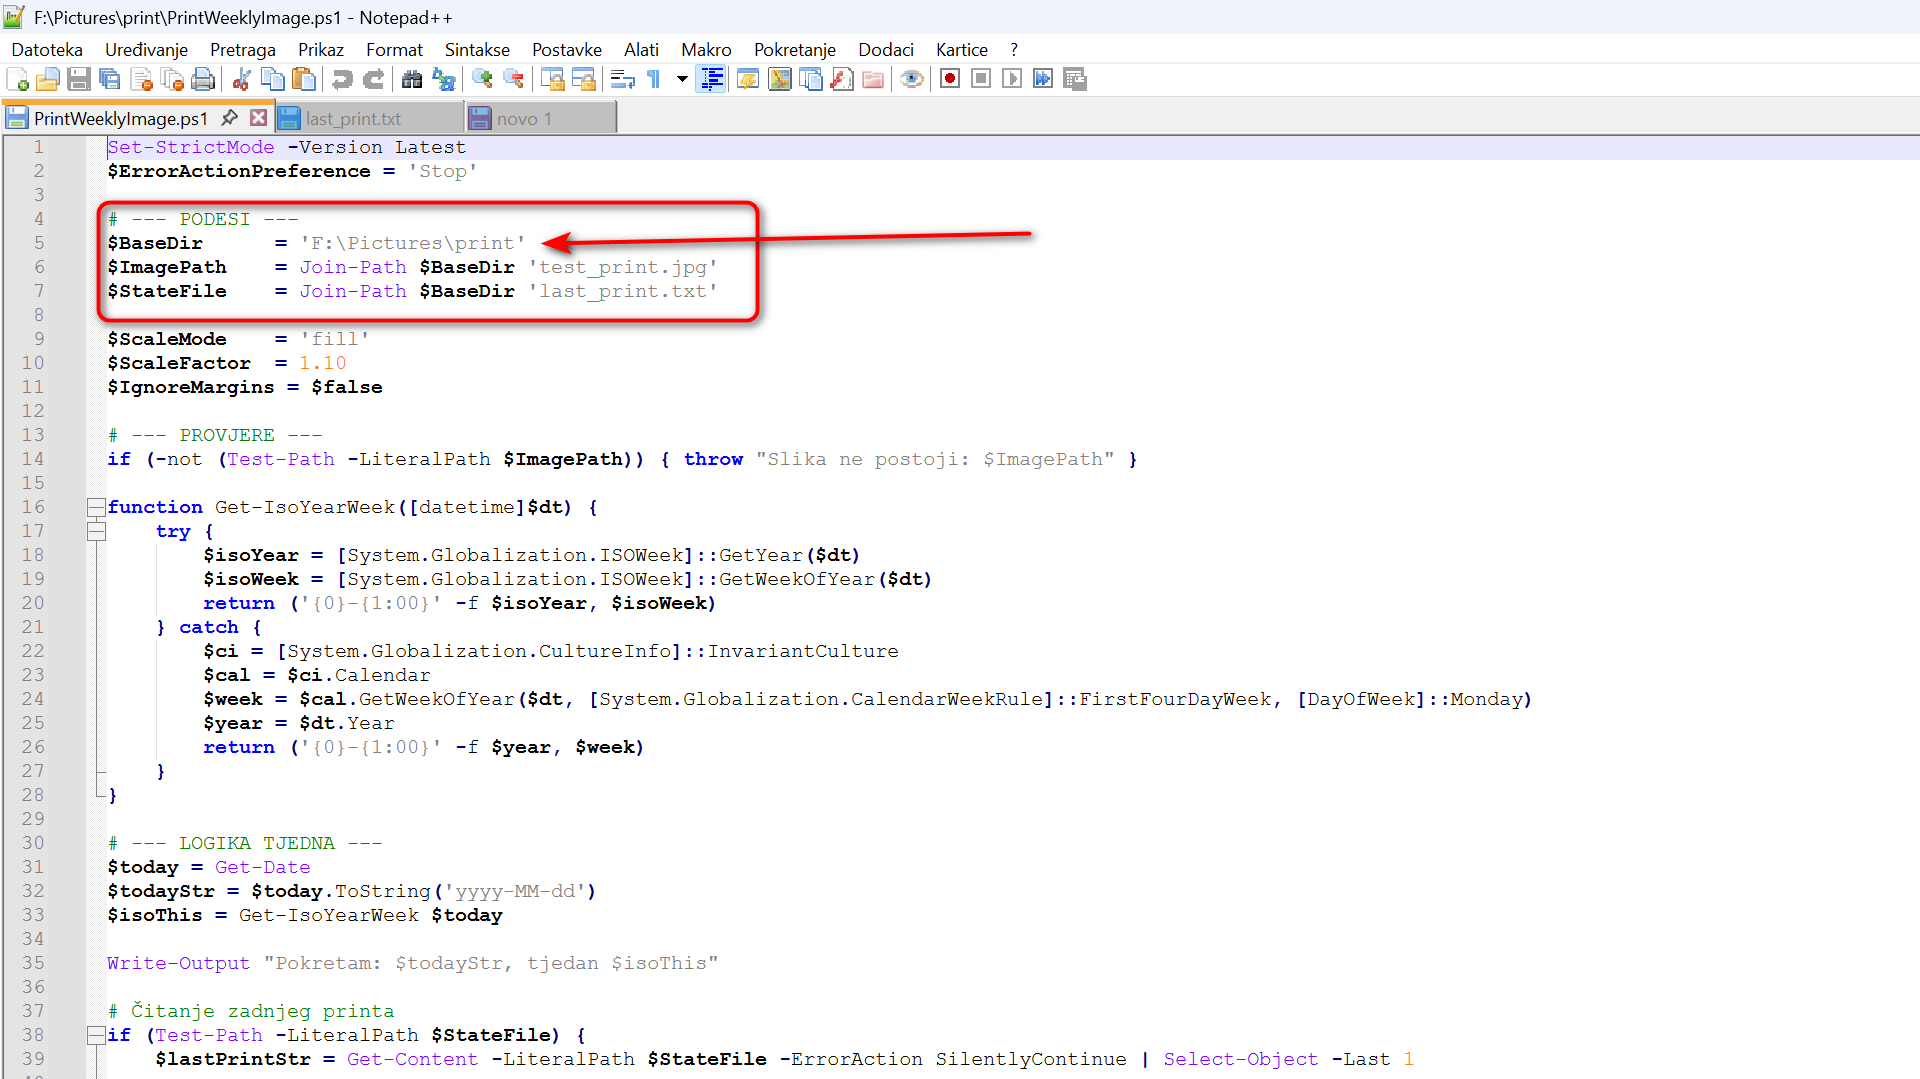
Find the following piece of code at the very beginning and change what's in red:
--- MUST SET ---
$BaseDir = 'F:\Pictures\print'
$ImagePath = Join-Path $BaseDir 'test_print.jpg'
$StateFile = Join-Path $BaseDir 'last_print.txt'
$BaseDir: This is the only thing you must change. Instead of F:\Pictures\print, type the exact path to the folder where you unpacked the downloaded files (eg C:\Users\Name\Documents\Printer Maintenance). Make sure the path is enclosed in single quotes. When you are in that folder, click on the address bar at the top where it will show you the path.
$ImagePath: If you decided to use one of your own pictures, change its name here. If you use my attached image, please leave it as is.
$StateFile: This is a text file that the script will create itself to remember when the last print was done. Leave it as it is.
Setting up automation in the Task Scheduler
In order for the script to run alone and inconspicuously in the background, it is necessary to adjust the Windows Task Scheduler:
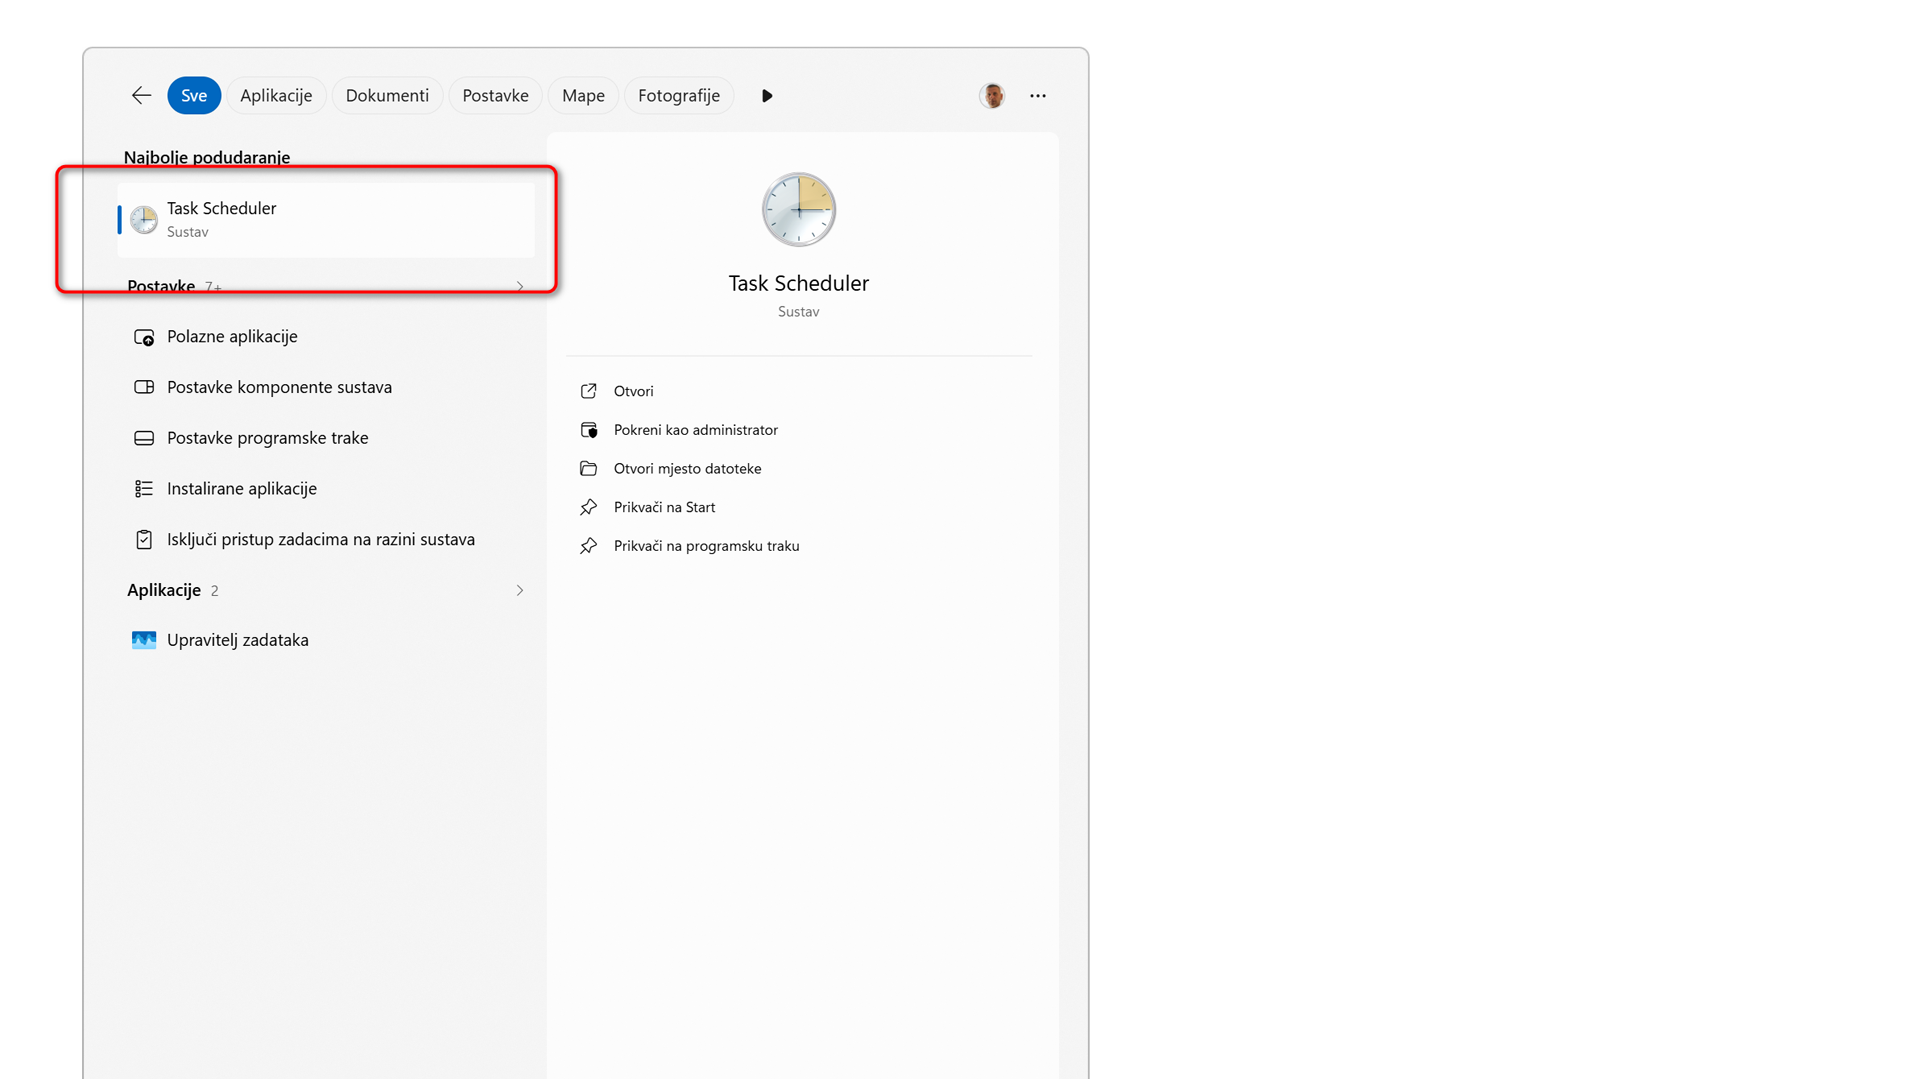
Open the Start menu, type Task Scheduler and run it.
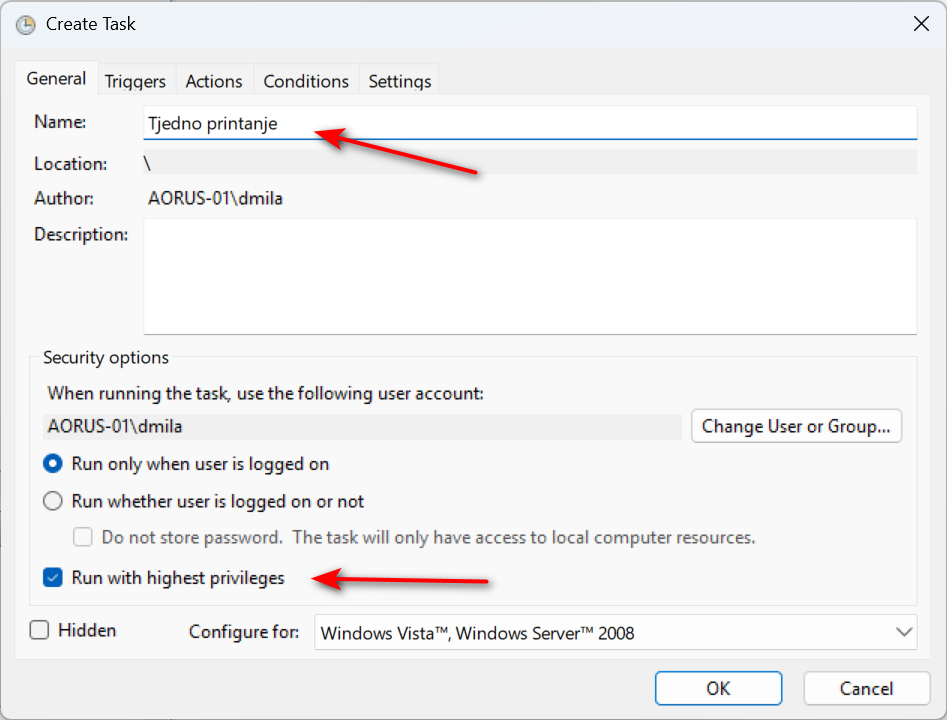
1. Tab General (General):
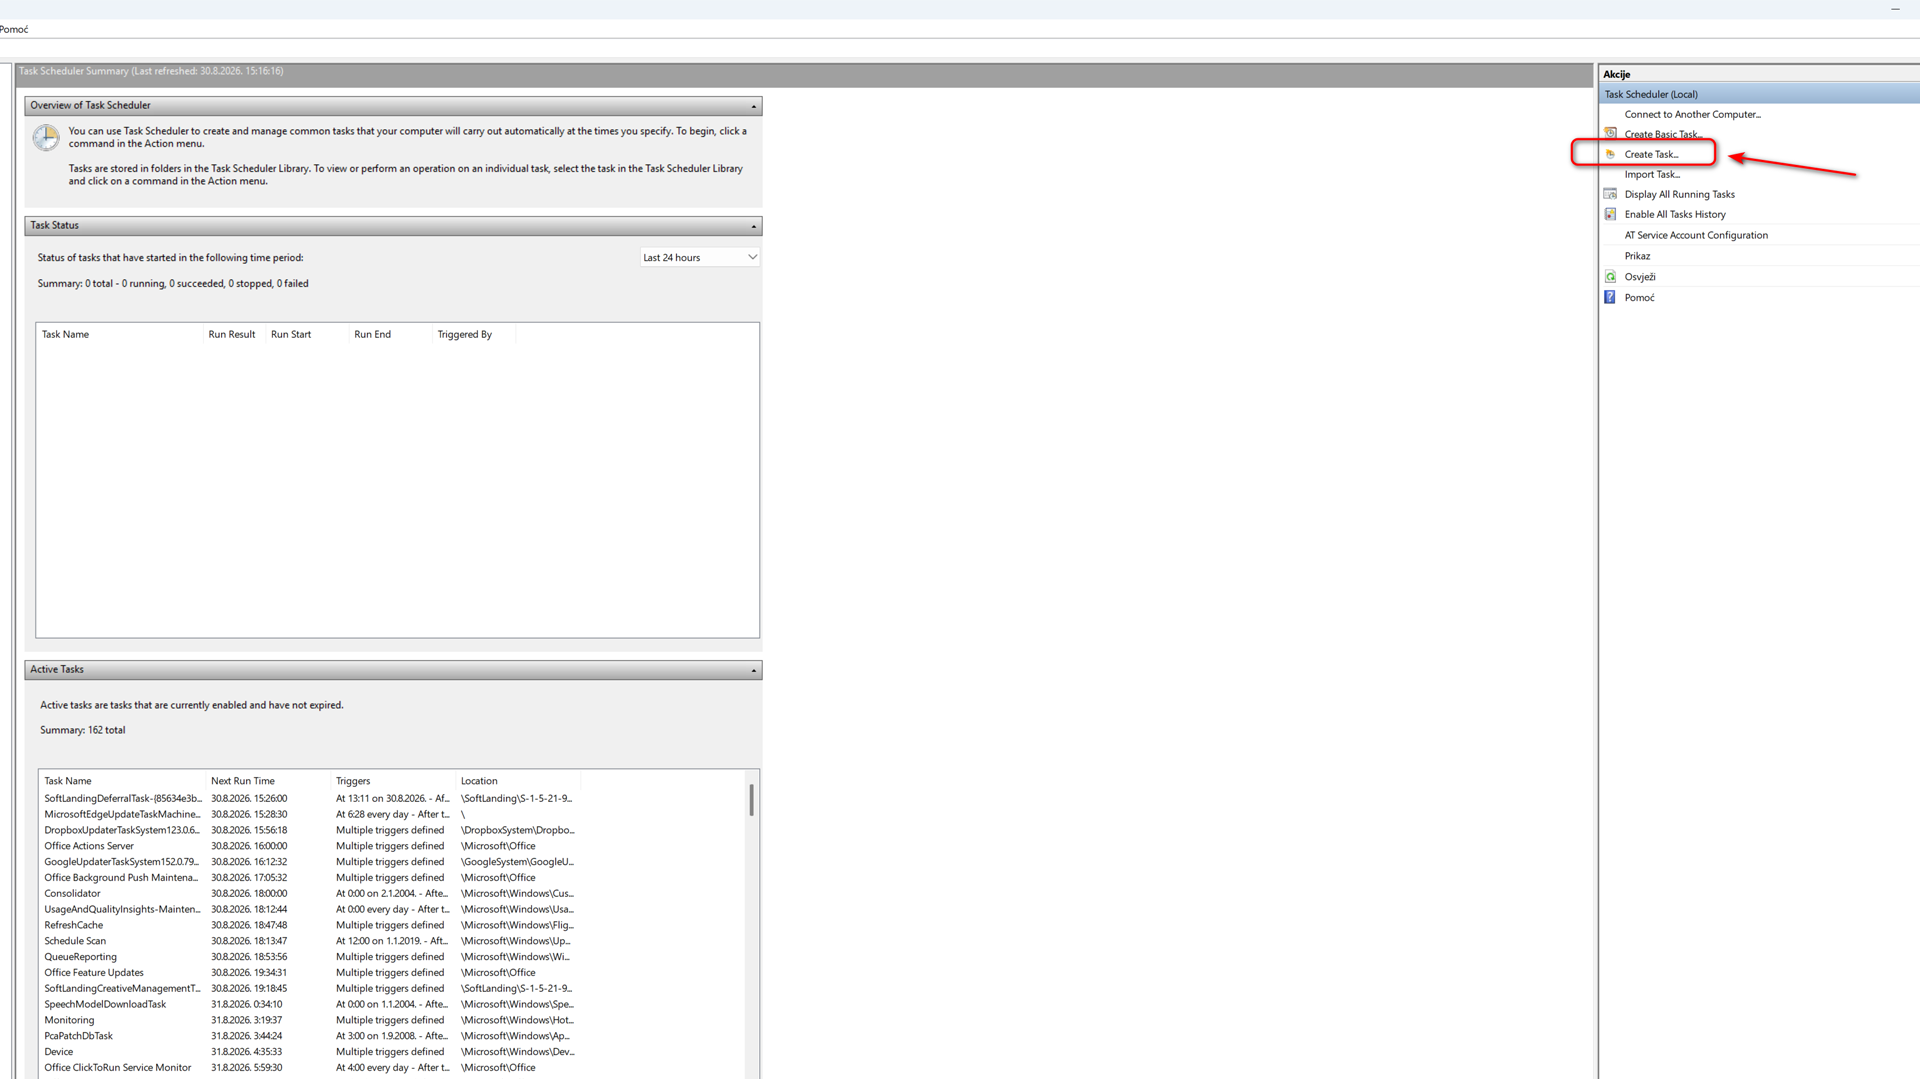
In the right menu, click on Create Task... (not Basic Task).
In the Name field, enter the name of the task (eg Printer Maintenance).
At the bottom, be sure to check the Run with highest privileges option.
2. Tab Triggers:
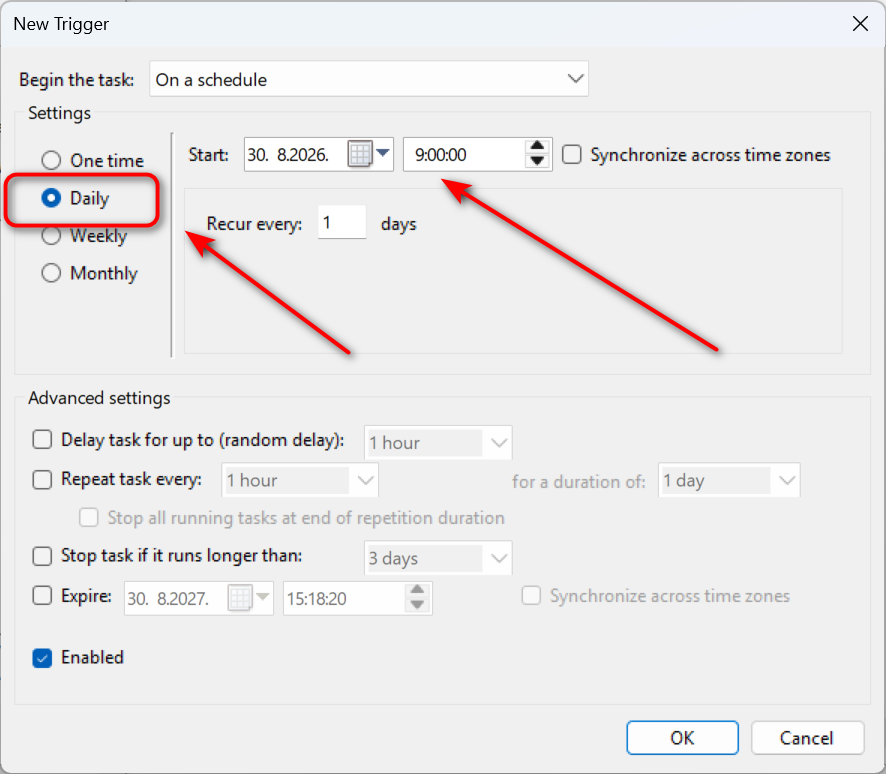
Click on New... (New).
Under Begin the task, select On a schedule.
Set to Daily and select a time, eg 09:00:00. Click OK.
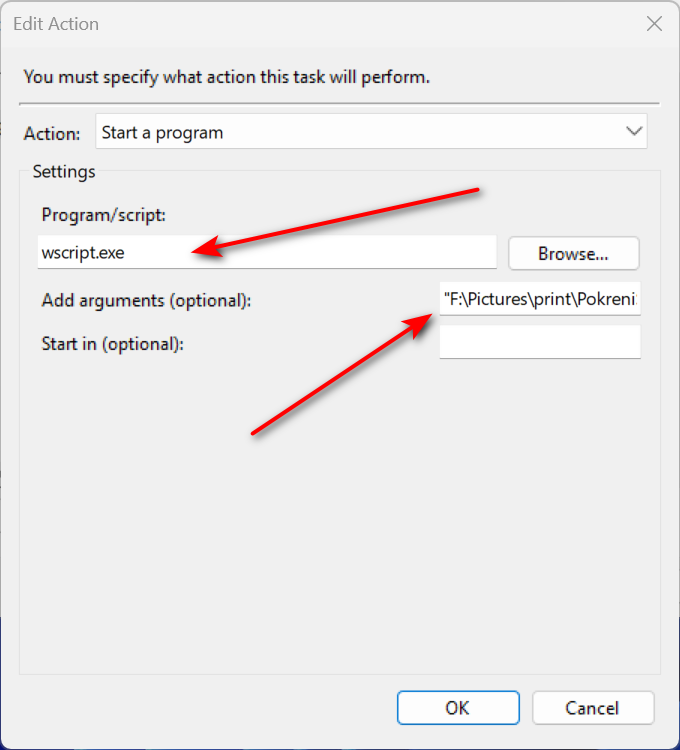
3. Tab Actions:
Click on New...
Under Action, leave Start a program.
Under Program/script type: wscript.exe
Under Add arguments (optional) write exactly this (replace the path with your own!):
'F:\Pictures\print\RunHidden.vbs'
Click OK.
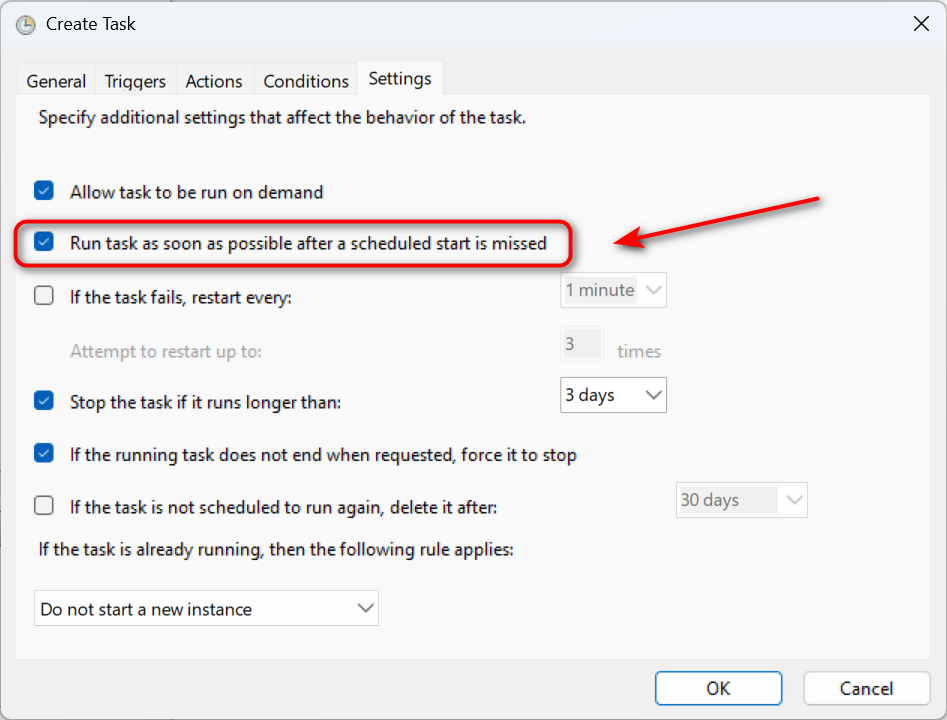
4. Tab Settings (Settings) - KEY STEP:
Be sure to check the box Run task as soon as possible after a scheduled start is missed.
This ensures that the script will print as soon as you turn on the computer, if it was shut down at the scheduled time.
Testing optional
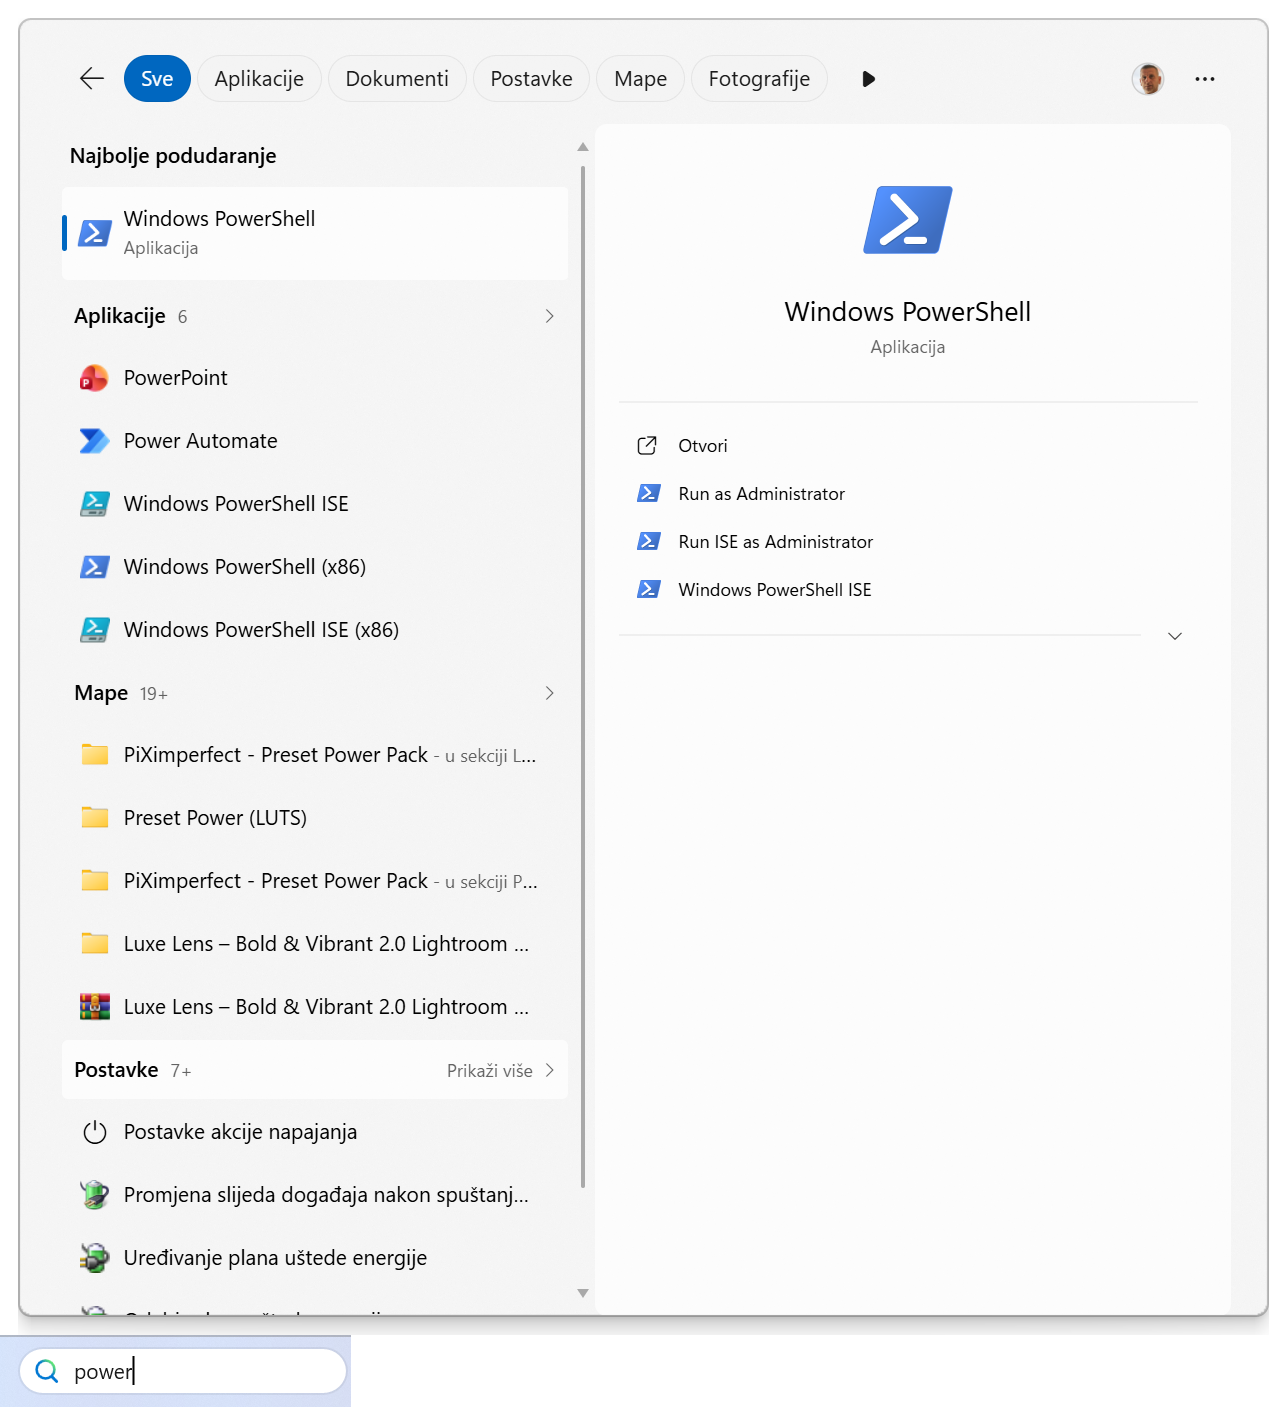
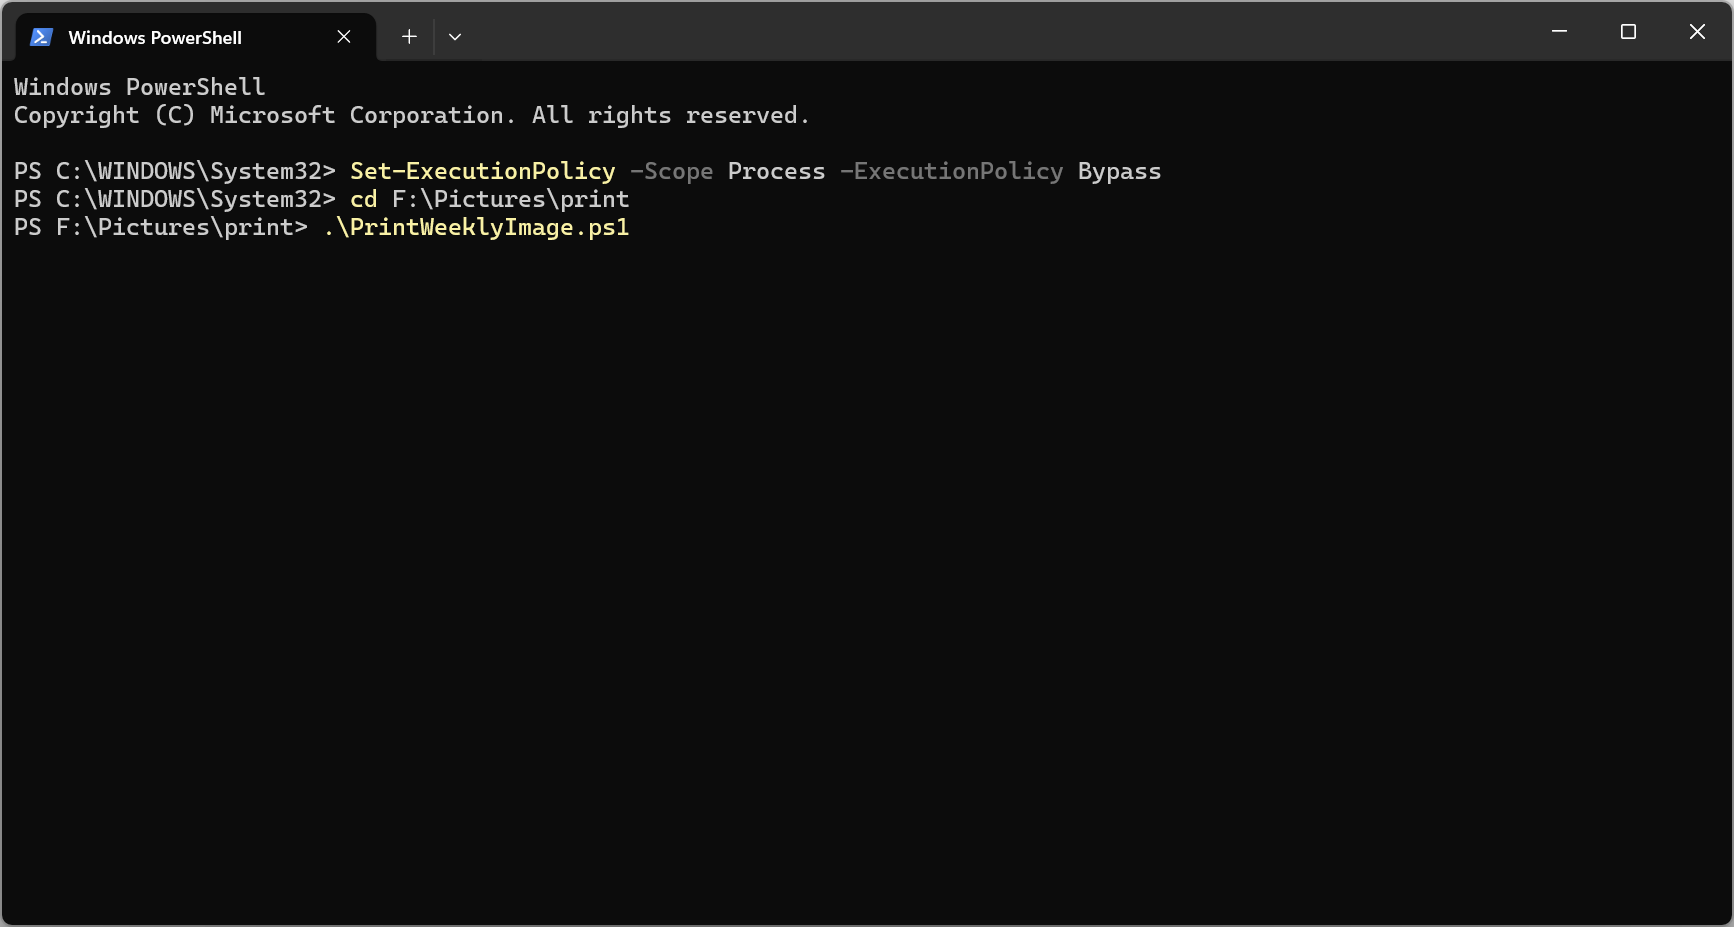
1. Open PowerShell Click on Start, enter powershell and open it.
2. Allow the script to run Copy this command into PowerShell, paste (right click) and press Enter. This is necessary because Windows blocks third-party scripts by default: Set-ExecutionPolicy -Scope Process -ExecutionPolicy Bypass
3. Position yourself in the folder Enter the path to your folder where the script is located and press Enter: cd F:\Pictures\print
4. Run the script Type this and press Enter: .\PrintWeeklyImage.ps1
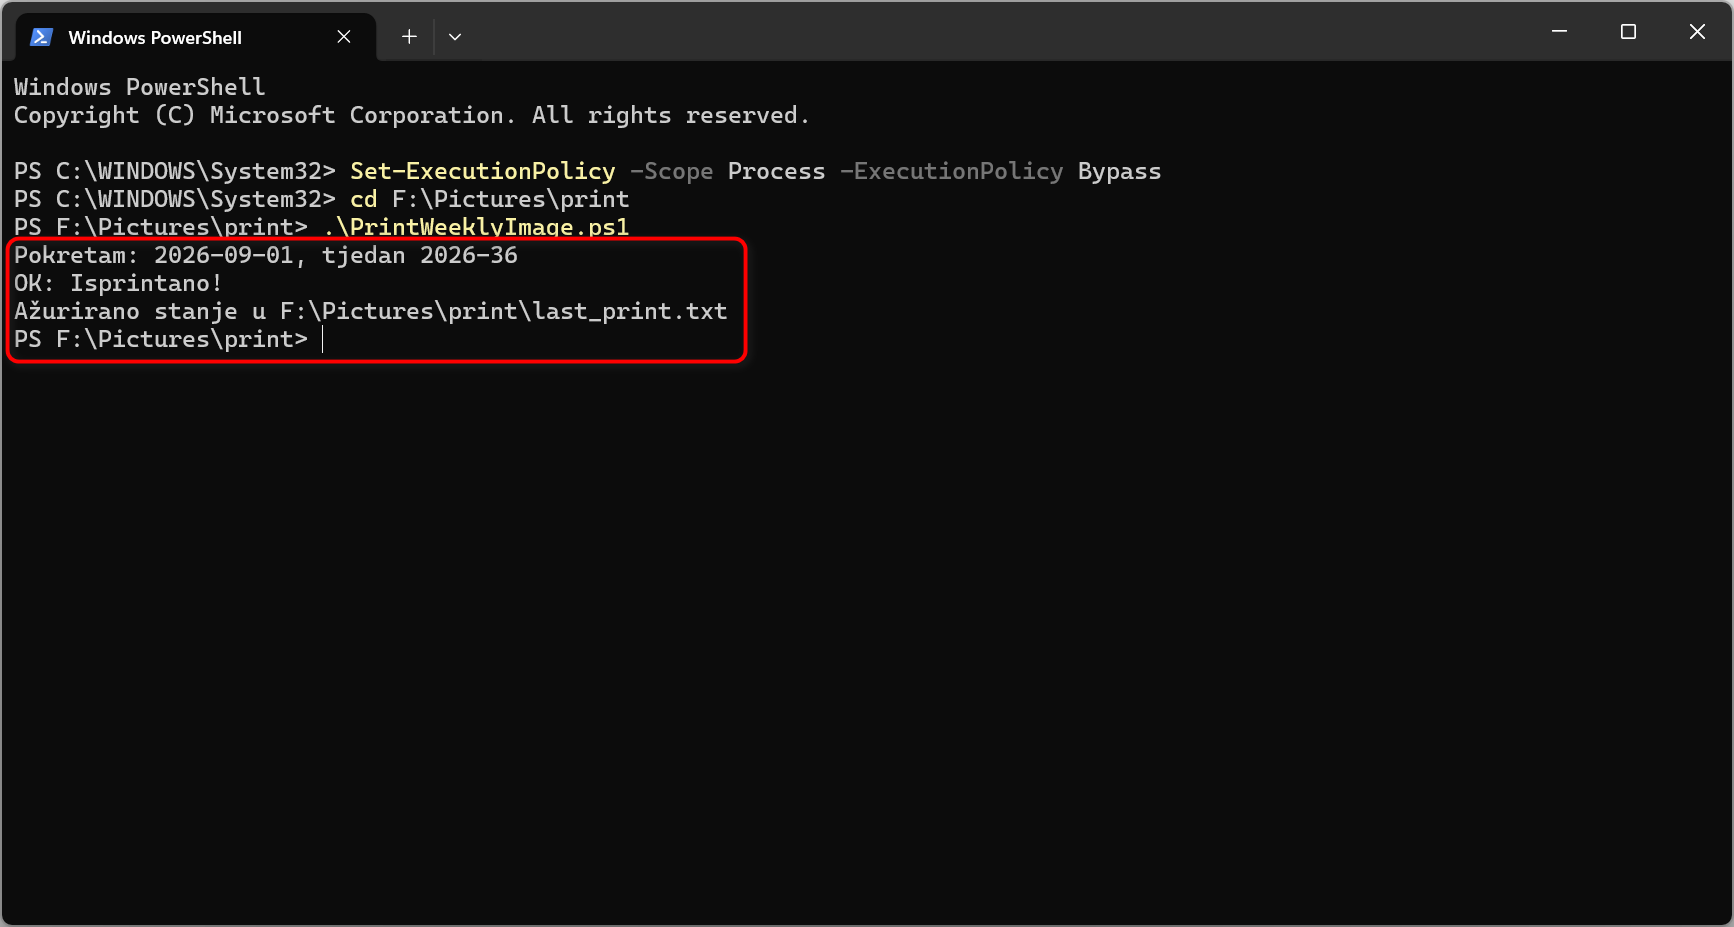
What must happen now:
-
The script will print in the console that it is starting to work.
-
Your printer must start printing the image.
-
The script will create a file last_print.txt and enter today's date in it (if it does not exist).
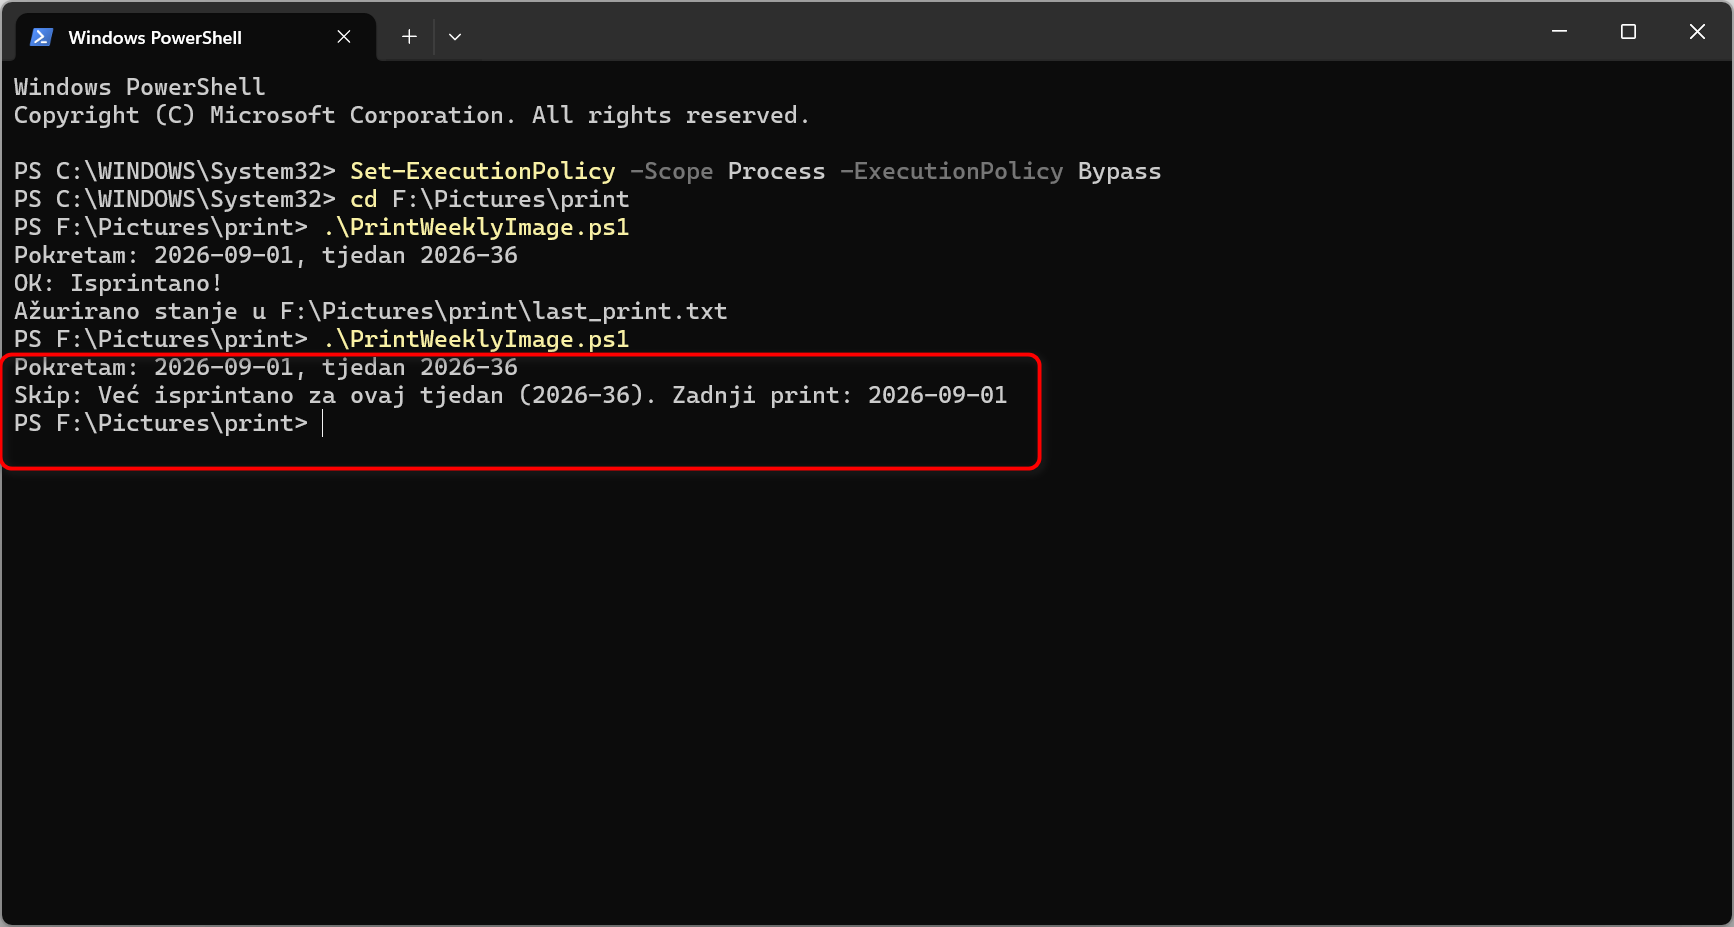
The key step after you print: When the printer ejects the paper, be sure to run the script again.
You are doing this to check the blockage. Script now he must not print, but must write in the console 'Skip: Already printed for this week...'. If you don't test it, the Task Scheduler will print the image again tomorrow morning, and our goal was for it to do this only once a week.